
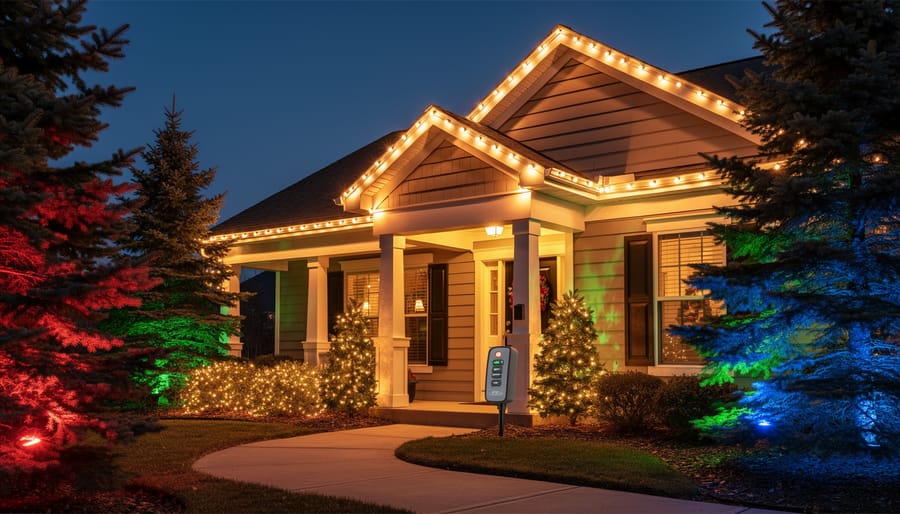
Custom holiday lighting design transforms an ordinary property into a memorable seasonal showcase by strategically combining fixture placement, color theory, architectural accentuation, and programming techniques tailored specifically to your home or business. Unlike standard off-the-shelf decorations, a custom approach considers your building’s unique features, landscape contours, and the emotional atmosphere you want to create, resulting in a display that feels personal rather than mass-produced.
The distinction between generic and custom lighting begins with assessment. Professional designers start by evaluating architectural lines, outdoor focal points, tree canopies, and sightlines from the street and neighboring properties. This analysis reveals opportunities that cookie-cutter approaches miss: perhaps a roofline peaks at an unexpected angle that deserves emphasis, or mature evergreens in your front yard could frame the entrance with warm white uplighting. These details matter because they turn your display from pleasant into extraordinary.
Creating a truly custom design requires balancing artistic vision with technical precision. Color temperatures must complement your home’s exterior palette. Spacing between bulbs affects both visual impact and energy consumption. Programming sequences should enhance rather than overwhelm your property’s character. Whether you choose to design and install the display yourself or work with experienced lighting professionals, understanding these principles ensures your holiday presentation reflects thoughtful intention rather than haphazard decoration.
The process involves measurable steps, from initial planning and material selection through installation, testing, and seasonal maintenance. Each phase builds on careful decisions about fixture types, power requirements, and weather protection that will keep your display brilliant throughout the season.
Understanding Custom Holiday Lighting Design
Custom holiday lighting design is the art of creating a display that tells your property’s unique story. Rather than draping generic strings of lights wherever they fit, custom design starts with your home or business as a canvas, identifying architectural details worth highlighting, understanding how light and shadow interact with your structure’s lines, and choosing colors and patterns that enhance rather than overwhelm. It transforms columns into glowing sentinels, accentuates window frames with precision, traces rooflines to reveal your building’s character, and creates focal points that draw the eye exactly where you want it to go.
The difference between standard and custom installations becomes clear when you compare them side by side. Generic lighting follows a one-size-fits-all approach: the same spacing, the same colors, the same clip-and-hang method on every house down the street. Custom design considers your property’s specific features, a Victorian’s ornate gingerbread trim demands different treatment than a modern home’s clean horizontal lines. It accounts for how your landscape flows, where guests naturally look when approaching, and what emotions you want to evoke. A custom display might use warm white lights to create elegant sophistication on a colonial facade while incorporating subtle color accents in garden beds, or it might embrace bold, playful colors on a contemporary building where architectural simplicity provides the perfect backdrop.
This personalized approach extends beyond the physical installation. True custom design begins with conversation and vision-building, walking your property at different times of day, discussing what you love about your space, understanding whether you envision classic elegance, whimsical charm, or dramatic impact. It acknowledges that your home or business deserves lighting as individual as you are, creating not just a decorated building but a memorable experience that resonates with everyone who sees it.
What You’ll Need: Tools and Materials
Before you begin your custom holiday lighting project, gathering the right equipment makes the difference between a frustrating experience and a smooth installation. While basic consumer-grade materials from big-box stores work for simple displays, investing in professional-quality equipment delivers better results and longer-lasting performance.
The foundation of any custom lighting design starts with quality lighting fixtures themselves. LED strands have largely replaced incandescent options because they use 80-90% less energy, stay cool to the touch, and last for years. Professional-grade LED lights feature heavier wire gauge, commercial-rated sockets, and color temperatures that remain consistent across multiple strands, avoiding the mismatched appearance that plagues cheaper alternatives. C9 bulbs create bold statements on rooflines and larger features, while C7 and mini lights suit detailed work around windows and smaller architectural elements. Specialty options like net lights, icicle strands, and rope lights expand your design possibilities.
Here’s what you’ll need to gather before starting your installation:
- Lighting fixtures: LED strands in chosen bulb sizes, colors, and styles for different property zones
- Installation hardware: All-purpose clips, shingle tabs, gutter hooks, and magnetic clips (never nails or staples that damage surfaces)
- Power management: Outdoor-rated extension cords (14-gauge minimum for heavier displays), multi-outlet stakes, timers with photo sensors, and GFCI-protected power strips
- Safety equipment: Stable ladder appropriate for your heights, work gloves, non-slip shoes, and a headlamp for low-light work
- Design tools: Measuring tape, notepad for sketching layouts, camera for documenting features, and electrical tester for verifying outlets
Professional installers typically use commercial-grade clips designed for specific surfaces, different fasteners work best on shingles, gutters, brick, or stucco. These specialized clips hold lights securely through wind and weather while removing cleanly without residue. Quality extension cords feature molded, watertight connections rather than simple plug ends that let moisture infiltrate.
The planning tools matter as much as the physical materials. Accurate measurements prevent the common mistake of running short on lights mid-installation, while a detailed sketch helps you calculate exactly how many strands you need for each zone. A simple electrical tester ensures your outdoor outlets have proper GFCI protection before you connect valuable lighting equipment.
Safety Considerations Before You Begin
Before the lights go up, take safety seriously. Custom holiday lighting work involves electricity, heights, and outdoor conditions, a combination that demands respect and preparation. Rushing this process or skipping precautions can turn a festive project into a dangerous situation.
Start with electrical safety. All outdoor lighting must connect to circuits with GFIC requirements for outdoor receptacles which protect against ground faults and shock hazards. Check that your outdoor outlets are GFCI-protected, test them using the built-in buttons before plugging in anything. Calculate your power load carefully: most household circuits handle 15 or 20 amps, and overloading them creates fire risk. Add up the wattage of every strand, inflatable, and controller you plan to connect, then keep your total under 80% of circuit capacity. When in doubt about electrical capacity or proper connections, stop and consult an electrician.
Ladder and height safety deserves equal attention. Use a sturdy, appropriately-rated ladder on level ground, maintain three points of contact while climbing, and never overreach, move the ladder instead. Roof work multiplies the risks: steep pitches, slippery shingles after morning dew, and loose gutters all create fall hazards. Wear rubber-soled shoes with good grip, and consider using a safety harness for any roof installation. Review comprehensive hanging Christmas safety tips before starting.
Weather timing matters. Install during dry, calm days when temperatures stay above freezing. Cold makes materials brittle and fingers clumsy. Strong winds turn climbers into sails. Check forecasts and postpone if conditions look questionable.
Finally, recognize your limits. Multi-story homes, complex rooflines, commercial properties, and intricate designs often require professional expertise in both GFCI and electrical safety and specialized equipment. There’s no shame in calling professionals, it’s the smart choice when safety or technical complexity exceeds your experience.
Step 1: Assess Your Property’s Features and Create a Vision
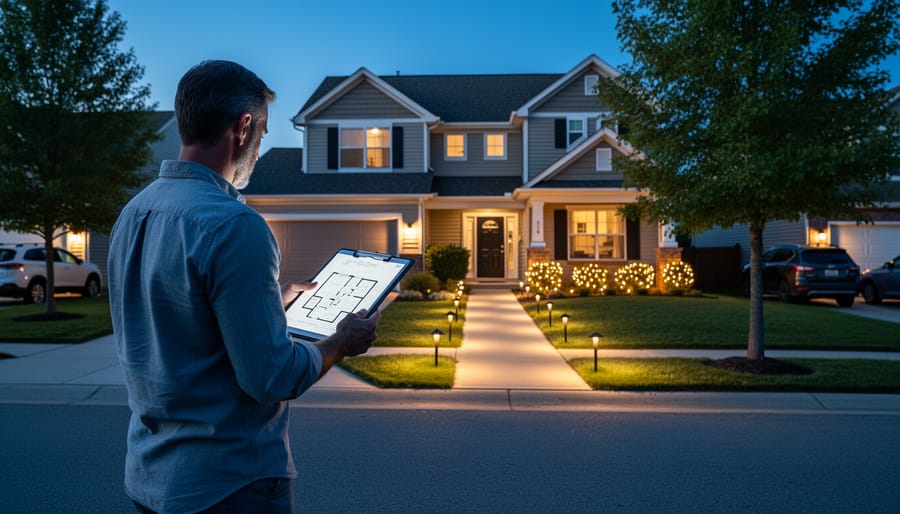
Start with a daylight walkthrough of your property while the sun reveals every architectural detail. Walk the perimeter slowly, viewing your home or business from multiple angles, especially from the street where most people will experience your display. Notice how the roofline creates visual lines, where columns frame doorways, which windows offer symmetry, and how trees might serve as natural focal points.
Bring your phone or camera to capture photos from various distances and angles. These reference images become invaluable during the design phase when you’re sketching layouts indoors. Take measurements of key features you’re considering highlighting, the length of rooflines, the height of columns, the span across windows, the circumference of tree trunks. Write everything down. Guessing leads to buying too much or too little material.
Stand across the street and identify your property’s natural focal points. Perhaps it’s the grand entrance, a magnificent tree in the front yard, or unique architectural details that deserve emphasis. Consider sightlines from where neighbors and passersby will view the display. What captures attention first? What deserves to be the centerpiece?
As you assess, begin developing your cohesive design theme. Will you create a warm, traditional display with classic white lights highlighting elegant lines? A vibrant, colorful celebration that fills every corner with joy? A sophisticated monochromatic design? Your theme should honor your property’s character while reflecting your personal style. Custom holiday lighting design succeeds when the display feels intentional, not random, when every lit element serves the overall vision you’re creating.
Step 2: Develop Your Lighting Plan
With your property assessment complete and vision defined, it’s time to translate those ideas into a workable blueprint. A lighting plan bridges the creative and technical sides of custom holiday lighting, it’s where artistic flair meets practical execution.
Start by sketching your property layout on paper or using a simple design app. Mark each area you identified during your property walk, noting dimensions and architectural features. This doesn’t need to be architect-level precision, but accurate enough to calculate quantities and placement. Some homeowners find graph paper helpful for maintaining scale, while others prefer photographing their home and sketching directly onto printed copies.
Your plan should map out several key elements:
- Color palette, warm white, multicolor, or themed combinations that complement your home’s exterior
- Lighting styles for different zones, icicle lights for eaves, net lights for shrubs, pathway stakes for walkways
- Power requirements and maximum loads for each circuit you’ll use
- Connection points where strands will join and where extension cords will run
- Focal feature priorities, which elements get the most dramatic lighting versus subtle accents
Once your layout takes shape, calculate quantities. Measure rooflines, window frames, and tree heights to determine strand lengths needed. Add fifteen percent extra for overlaps, replacements, and spacing adjustments, professional installers always account for this buffer.
Planning power sources prevents frustrating mid-installation discoveries. Identify which outdoor outlets you’ll use, map how cords will route to them, and verify each circuit can handle the electrical load without tripping breakers. Group high-wattage features on separate circuits when possible.
Budget realistically by pricing quality materials rather than bargain options. Professional-grade lights cost more upfront but last years longer and create the polished look that defines custom installations. Your detailed plan makes shopping efficient and ensures you’re investing in exactly what your design requires.
Step 3: Test All Equipment Before Installation
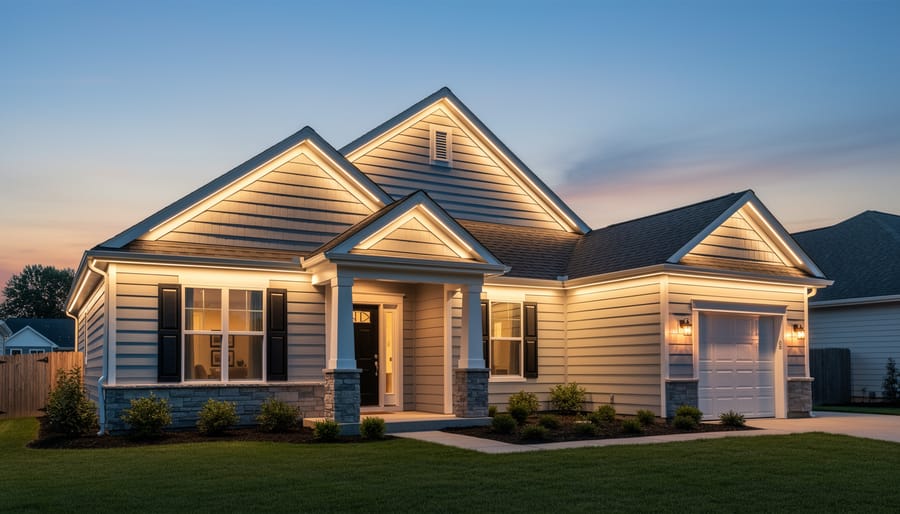
Nothing frustrates a custom lighting project faster than discovering a faulty strand while you’re already twenty feet up a ladder. Before you even consider climbing, spread out every component on your garage floor or driveway and run a thorough equipment check.
Start with the lights themselves. Plug in each strand completely, yes, every single one, and inspect for dead sections, flickering bulbs, or dark spots. When you find issues, replace those sections now rather than later. Test timers and controllers by setting them to cycle on and off, confirming they respond correctly to your programming. If you’re using smart controllers, verify they connect to your app or remote system.
Next, confirm all your GFCI outlets function properly by pressing the test button, then the reset button. These safety devices protect against electrical shock, especially crucial for outdoor installations where moisture poses constant risk. If a GFCI won’t reset or trips repeatedly, call an electrician before proceeding.
Check your extension cords for fraying, damaged plugs, or exposed wiring. Examine clips, fasteners, and mounting hardware to ensure you have everything you need to install light clips and secure your display properly. Replace any questionable components.
This verification step takes an extra hour, but it prevents hours of frustration mid-installation. You’ll work confidently knowing everything functions perfectly, allowing you to focus on creating that stunning custom display you’ve envisioned.
Step 4: Install Lights Following Your Design Plan
With your design plan in hand and equipment tested, installation day transforms vision into reality. Start at your primary power source, typically an outdoor GFCI outlet near where your main display begins. This working-from-source approach prevents awkward cord runs and ensures you never exceed safe electrical loads on any single circuit.
Begin with your property’s most prominent features. For most homes, rooflines create the strongest visual impact and establish the framework for everything else. Install these anchor elements first, then build outward to secondary features like windows, columns, and landscaping. This ensures your focal points look perfect even if time or materials run shorter than planned.
- Position your ladder safely and climb only as high as necessary to reach attachment points comfortably. Never overreach, move the ladder instead.
- Use proper clips designed for your specific surface: all-in-one clips for shingles, gutter hooks for eaves, adhesive clips for smooth surfaces. These maintain clean lines and prevent damage that nails or staples cause.
- Space clips consistently every 12 to 18 inches to prevent sagging. Measure the first few intervals, then use that spacing as your visual guide.
- Lay lights along surfaces before securing them to verify spacing and coverage. Adjust placement until lines look straight and even from viewing distance.
- Clip lights firmly but without crushing wires. The bulb should face forward, and the cord should follow the architectural line naturally.
- Run extension cords along edges, tucked behind gutters or architectural trim where possible. Use outdoor-rated cord covers when crossing walkways.
- Make all connections before plugging anything in. Ensure male and female ends meet completely, then wrap connections with electrical tape or use weatherproof connection covers.
Work methodically through each zone of your design, stepping back periodically to view your progress from street level. Those few extra minutes checking alignment save hours of frustrating adjustments later. Keep cords taut but not stretched, leave slight slack to accommodate wind movement and temperature changes that cause materials to contract.
Step 5: Connect Power and Configure Settings
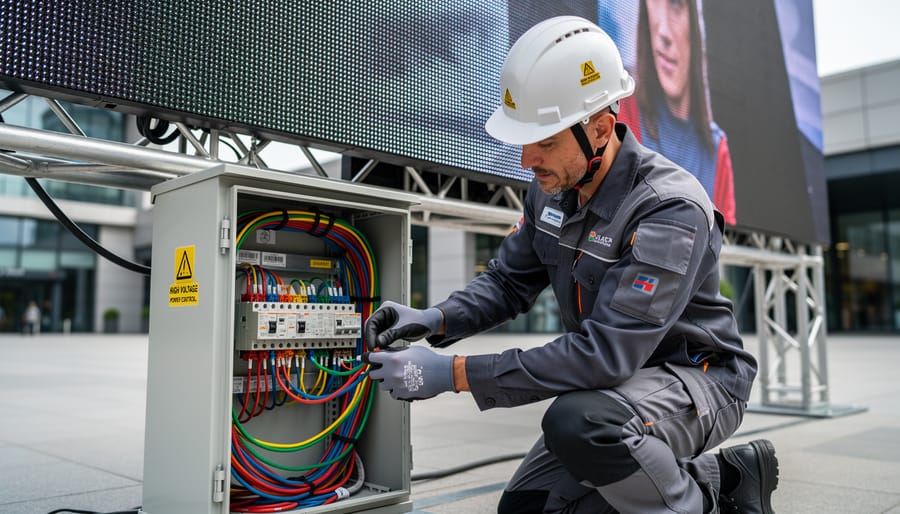
With your lights securely installed, the moment arrives to bring your display to life. Start by connecting each section to its designated power source, working systematically from your main circuits outward. Before plugging everything in, verify that your outdoor outlets have GFCI protection, this is non-negotiable for safety. Connect one zone at a time and immediately check that circuit breakers don’t trip, which signals overload. If a breaker trips, you’ve exceeded capacity and must redistribute lights across additional circuits.
Once power connections prove stable, turn your attention to timing. Manual timers work fine for simple displays, but smart lighting controls offer precision and flexibility that save hours with automation throughout the season. Program your display to illuminate during peak viewing hours, typically from dusk until 10 or 11 PM, adjusting for your neighborhood’s rhythms. If you’re using controllers for animated sequences or color-changing effects, configure settings now while you can easily access the control box.
Finally, weatherproof every connection point. Wrap outdoor-rated electrical tape around plug junctions, elevate connections off the ground where possible, and ensure no exposed wire contacts metal surfaces. Take a final walk-through at dusk to confirm everything activates on schedule and operates smoothly before calling this critical step complete.
Verifying Your Installation and Making Adjustments
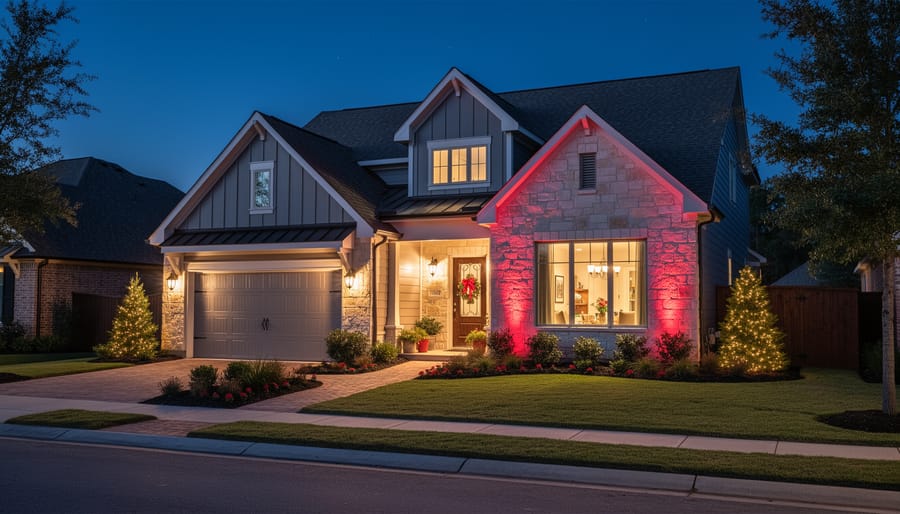
Once your lights are connected and powered on, resist the urge to declare victory. The verification phase separates amateur installations from truly custom displays that achieve professional polish.
Start your evaluation at dusk, when ambient light still competes with your display. This reveals whether your focal points command attention or get lost. Walk to the street and view your property as visitors will see it. Stand where cars slow down, where neighbors pass, where the eye naturally lands. Does the design guide the viewer’s gaze intentionally, or does it scatter attention randomly?
Move closer and inspect each zone systematically. Look for dark gaps where spacing stretched too wide, burned-out bulbs you missed during testing, or sections hanging unevenly. Check that vertical lines remain truly vertical and that roofline coverage follows the architecture without dipping or sagging. Run your hand along cords to ensure clips hold securely, loose sections will migrate in wind.
Return after full darkness falls. The display transforms completely without daylight interference, and flaws become obvious. Uneven coverage that seemed minor at dusk now creates distracting holes. Colors that appeared balanced may now overwhelm or disappear depending on bulb brightness and density.
Make adjustments immediately while ladders are still out and your design plan is fresh. Tighten spacing where gaps appear, redistribute strands for better balance, adjust angles to eliminate shadows. Test all settings, timers, effects, brightness levels, to confirm everything operates reliably.
Your display meets professional standards when it looks intentional from every viewing angle, maintains consistent coverage without gaps, and creates emotional impact that makes people slow down to admire your work.
Maintenance Throughout the Holiday Season
Once your custom holiday lighting display illuminates the night, maintaining that pristine appearance requires consistent attention throughout the season. The difference between a professional-looking installation and one that gradually deteriorates lies in proactive care.
Establish a twice-weekly inspection routine, ideally during early evening hours when the lights are on. Walk the perimeter of your property to spot burned-out bulbs immediately, even a few dark spots diminish the overall impact of your carefully designed display. Keep replacement bulbs readily accessible so you can address issues within twenty-four hours rather than letting them accumulate.
After severe weather events, inspect all connections and mounting points before dark. Wind can loosen clips, rain can infiltrate poorly sealed connections, and ice buildup can stress wires. Check GFCI outlets haven’t tripped and verify timer settings remain accurate, power outages can reset controllers to default settings.
Your timers deserve weekly attention as well. Adjust on-times as daylight hours shift throughout the season, ensuring your display activates at dusk rather than mid-afternoon or full darkness. Most homeowners find the optimal viewing window starts thirty minutes before sunset and runs until 10 or 11 PM.
For properties with extensive displays or limited time, professional maintenance packages provide peace of mind. These services typically include scheduled inspections, bulb replacements, and emergency repair visits, allowing you to enjoy your festive creation without the ongoing responsibility of technical upkeep.
When to Consider Professional Installation Services
Sometimes the smartest DIY decision is knowing when to hand the project to professionals. While you can absolutely install basic displays yourself, certain scenarios call for experienced teams who combine technical expertise with artistic vision.
Commercial properties demand an entirely different level of planning and execution. Businesses need displays that attract customers, reinforce brand identity, and withstand heavy foot traffic, all while meeting commercial electrical codes and insurance requirements. Professional teams handle permits, load calculations, and installations that hold up through months of continuous operation.
Limited time is a perfectly valid reason to hire experts. If you’re working sixty-hour weeks through the holidays or traveling frequently, paying for professional installation means you actually enjoy the season rather than spending weekends on ladders. The few hundred dollars saved rarely compensates for lost family time and added stress.
Complex custom designs truly benefit from professional artistic vision. If you’re imagining coordinated color schemes across multiple structures, synchronized lighting effects, or displays that complement landscape architecture, experienced designers create cohesion that’s difficult to achieve alone. They see possibilities you might miss and avoid common mistakes that undermine visual impact.
Safety concerns should always override budget considerations. If your property has challenging access points, requires working near power lines, or involves electrical work beyond simple plug-in connections, professionals carry liability insurance and the training to handle risks properly. Your family’s wellbeing matters more than any cost savings.
Frequently Asked Questions
Custom holiday lighting projects naturally raise practical questions, especially for first-time designers. Here are answers to the most common concerns we hear from homeowners and business owners planning their displays.
When should I start planning and installing my custom holiday lighting?
Begin planning your design in late September or early October to allow time for purchasing materials and scheduling installation. Actual installation typically works best in early to mid-November when weather is still mild but early enough to enjoy your display throughout the season.
How much do custom holiday lighting displays typically cost to operate?
LED displays use approximately 80-90% less energy than traditional incandescent lights, with most residential displays costing between $15-40 per month to operate when run for 5-6 hours nightly. The exact cost depends on your local electricity rates, display size, and operating schedule.
Should I choose LED or incandescent bulbs for my display?
LED lights are the superior choice for nearly all applications, they last 20-25 times longer than incandescent, stay cool to the touch reducing fire risk, offer vibrant colors, and dramatically reduce energy costs. While the initial investment is higher, the long-term savings and durability make LEDs the professional standard.
When does it make sense to hire professional installers instead of doing it myself?
Consider professional services for multi-story installations requiring extensive roof work, complex custom designs with animation or synchronized elements, commercial properties needing flawless presentation, or situations where you value time savings and want guaranteed results. Professionals also carry proper insurance and equipment for high-risk installations.
Storage represents another frequent concern. Invest in quality storage containers with dividers to prevent tangling and damage during the off-season. Label each container by location (front porch, roofline, backyard trees) to simplify next year’s installation. Store everything in a climate-controlled space if possible, as extreme temperature fluctuations can degrade electrical components and shorten bulb lifespan. Wrapping each strand around a cardboard piece before boxing prevents the frustrating tangles that turn next season’s setup into an ordeal.
Creating a custom holiday lighting display that truly reflects your property’s character is one of the most rewarding seasonal projects you can undertake. When approached with careful planning and attention to detail, the transformation from ordinary home or business to festive wonderland becomes not just possible, but deeply satisfying.
Whether you’ve decided to tackle the installation yourself or partner with experienced professionals, what matters most is the thoughtful design process. Taking time to understand your property’s unique features, developing a cohesive vision, and executing that plan with care creates displays that resonate emotionally with everyone who sees them. These aren’t just lights on a building, they’re stories told in color and illumination, memories captured in carefully placed strands that welcome neighbors and visitors into the season’s magic.
The beauty of custom holiday lighting design lies in its personal nature. No two properties share the same architecture, landscape, or story. Your display becomes an extension of your home’s personality or your business’s brand, creating connections that standard installations simply can’t achieve.
If you’ve followed each step methodically, you now have the knowledge to create something truly special. And if the process seems daunting, remember that professional designers bring both artistic vision and technical expertise to ensure your property shines brilliantly throughout the season. Either path leads to the same destination: a spectacular display that transforms ordinary winter evenings into something genuinely magical.